This is an enthusiast's guide for those who enjoy their 8L A3. Some aspects of the guide may apply to Volkswagen's Mk4 Golf and Bora as well as Audi's Mk1 TT.

My name is Raymond and I frequent a number of forums both local to Australia and global as rayray086. I've created this blog for me, as I'm a bit OCD in keeping all the info I need in one package. As of July 2011, my A3T is my daily driver and it is stock standard. I came out of an 8V Mk3 so there's plenty of power for me from the stock 1.8T. I'm mainly interested in the suspension and aesthetics side of things currently. I'm a part-time student currently and have no mechanical qualifications, just a passion in all things automobile.

I'll eventually use this as an outlet to document my build, so I'll be using the appropriate tags/labels to make them easy to find.

As I add info/articles/blogposts on, I hope you guys who make their way to my blog will find the information helpful! Don't be afraid to comment away either - I like getting feedback and knowing that people are reading this.

Showing posts with label electrics. Show all posts

01 October, 2011

Airride - Analog and digital gauges

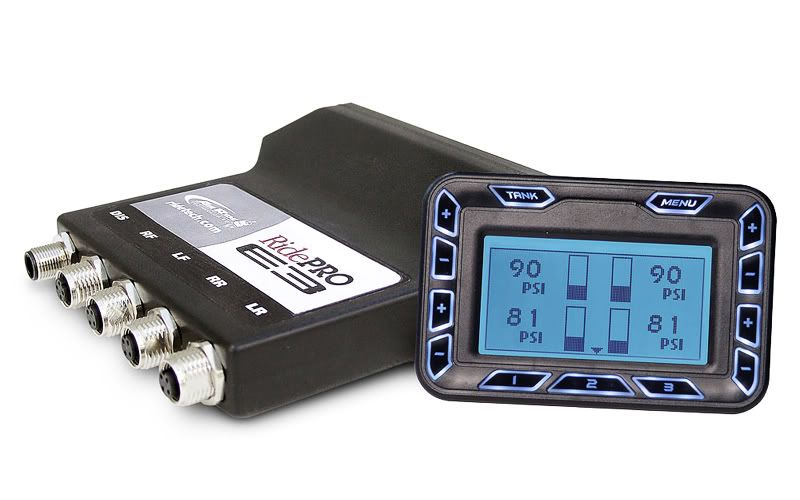
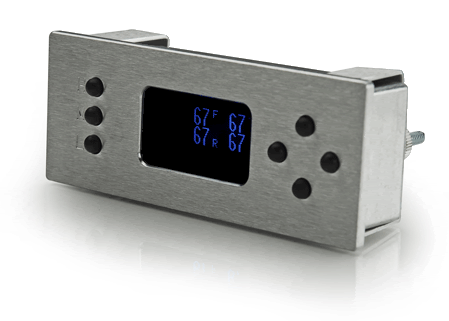
With most of the digital airride management systems out there, they already have pressure sensors included and have a built-in pressure display on their controllers (like the RidePro e3, AutoPilot and Dakota Digital's systems):

 RidePro e3

 
 Dakota Digital's rectangular controller

While it's not essential to have an air pressure readout on your airbags and/or tank, they're a very helpful tool in detecting and diagnosing leaks as well as checking for over-compression (of the tank) in the case that a pressure switch is faulty or absent.  Over-compression isn't a big deal for the tank itself, but the compressors may end up over-working and their operating life reduced.

Analog gauges
These are the most popular air pressure readout tool.  Very cheap and easy to mount, they usually come in the most popular gauge sizes (52mm mostly) so they can fit in off-the-shelf pod mounts.  Standard gauges run a single needle but some companies have released dual needles to reduce the total number of gauges required to monitor an entire airride system of a car.
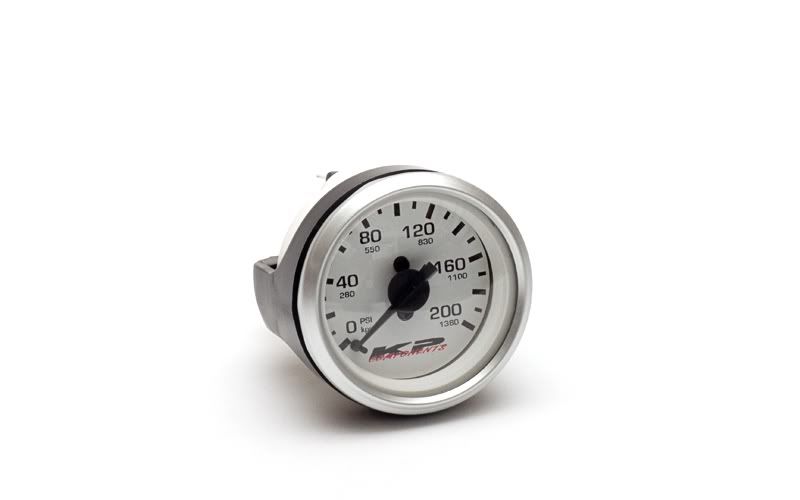
KP Component's single needle gauge.
200 PSI limit.
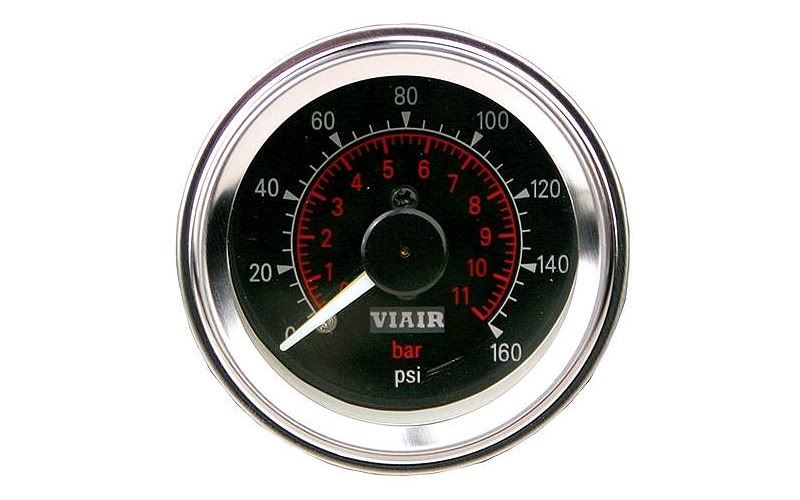
VIAIR's gauge.
160 PSI limit.
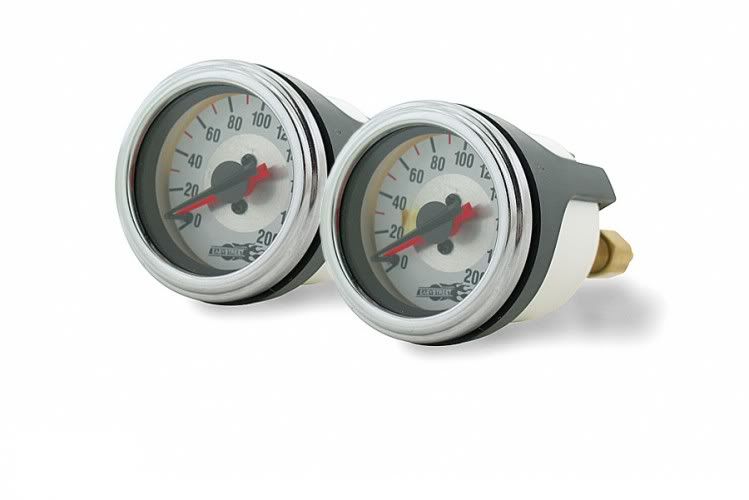
EasyStreet's dual needle gauge (note the different coloured needles).
200 PSI limit.

There are a variety of air pressure analog gauges catered for the air suspension market, ranging in generally aesthetic things such as background colour, back-lit colour, numbering font etc. as well as more important things like max pressure readout and resolution of the readout.  If you see the above examples, the VIAIR, while only having a max readout of 160 PSI, has a more accurate resolution of up to every 5 PSI, comparing with EasyStreet's and KP Components max readout of 200 PSI and a resolution of only 10 PSI.  For a gauge reading pressure of each airbag, a max readout of 160 PSI is more than enough, but an accurate resolution is much more desired.  Being able to read air pressure to the nearest 10 PSI isn't accurate at all, nor conducive for detecting very minor leaks.  However, when selecting a gauge to read tank pressure, a 160 PSI max wouldn't be a problem for a compressor that only runs up to 150 PSI (like the VIAIR 400C) but a 200 PSI gauge would be needed for one that can run up to 200 PSI (like the VIAIR 444C and 480C and AZ's OB2).  That said, a gauge reading in excess of 200 PSI would be best to better monitor the compressor so it does not over-work itself.

As these gauges are analog, they require an air line tapped out of the appropriate valve (a gauge monitoring tank compression will require an air line tapped from the tank).  As such, monitoring each airbag (four lines) plus an additional one for the tank would mean a lot of air lines routing from the back of the car to the location of the gauges, i.e. an installer's nightmare.  As such, there are also electronic/digital gauges available too.

These gauges are in the $30USD to $40USD range from Bagriders. 

Electrical/digital gauges
These gauges run pressure sensors on each valve (not unlike the ones used for pressure-based height adjustment digital management systems) and have an ECU that communicates the pressure readings from the sensor to the gauge.  The type of pressure sensor associated with this setup will determine the range the gauge will read to, and to what resolution (e.g. to the nearest 1 PSI).
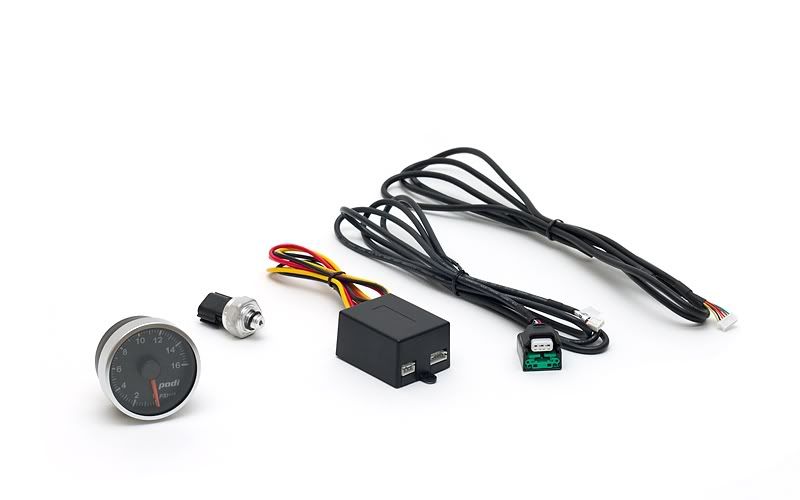
 One of Podi's electrical gauge kit
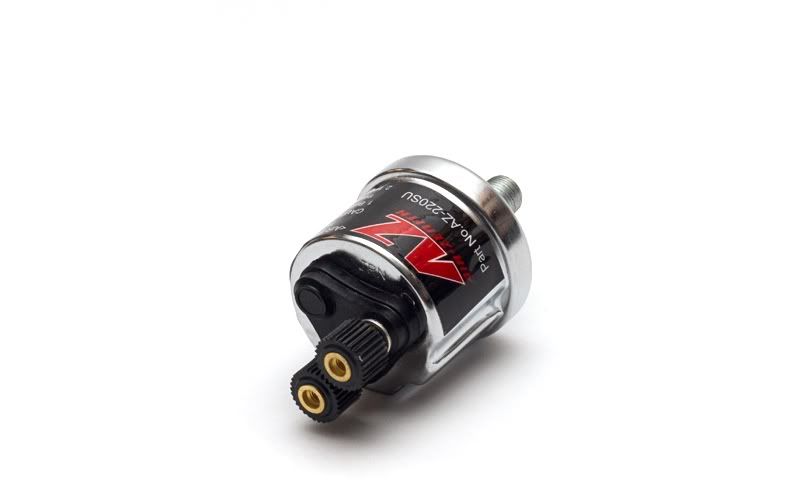
Air Zenith's pressure sensor used for a gauge readout

Due to the small size of these pod gauges, manufacturers are limited to the number of readouts they can display.
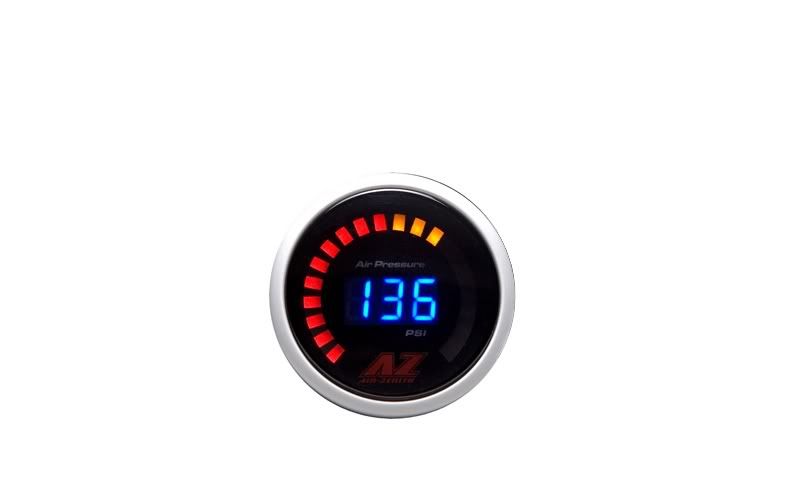
Air Zenith's LED gauge.  
Displays battery voltage for the first 30 seconds upon switching on, 
reads up to 220 PSI and can be optioned with an additional pressure sender
and switch which allows the user to alternate between two sources
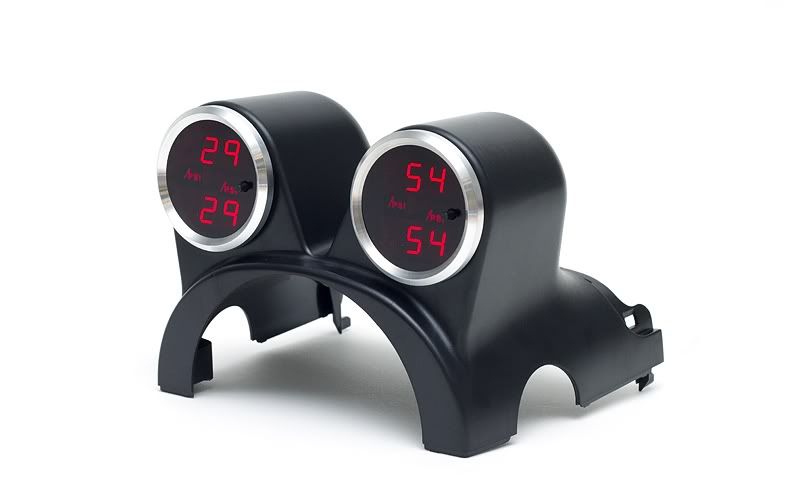
Podi's dual readout LED gauge.
200 PSI limit.

That said though, Dakota Digital came up with a "vacuum fluorescent display" that uses a much higher display resolution compared with AZ's and Podi's.  With this, they were able to make the Odyssey Series 2.
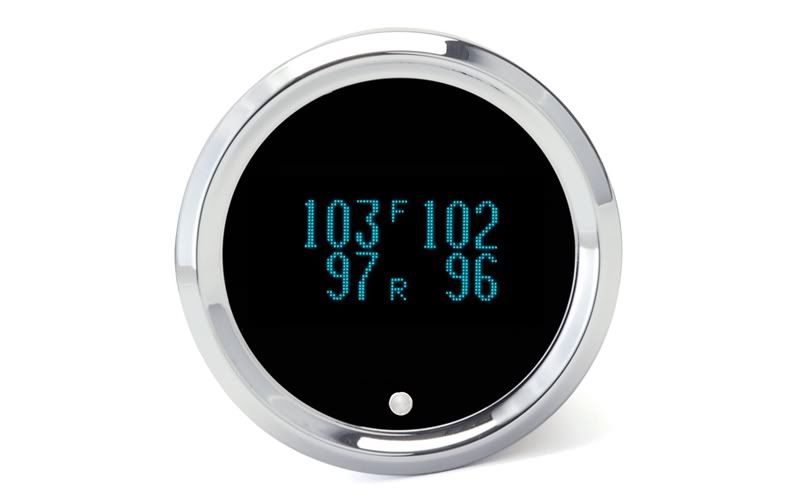
Dakota Digital Odyssey Series 2.
Quad pressure readout for airbags (150 PSI limit with 1 PSI resolution) 
with selectable tank readout (400 PSI limit with 2 PSI resolution).
User-defined high and low warning points programmable to external buzzer/light.

There are also electrical gauges running a dial setup, retaining the conventional look without the frustration of routing an air line to the gauge.
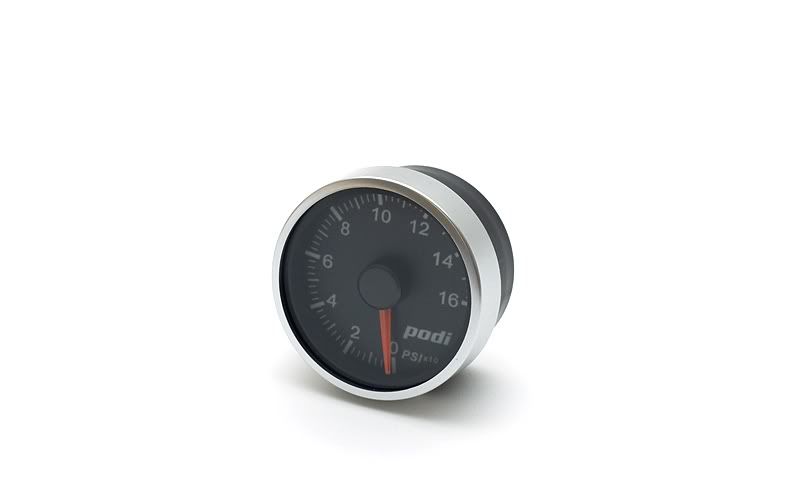
Podi's electronic dial gauge.
160 max limit.  Has programmable overfill warning.

The cost of these gauges are significantly higher due to the technology involved as well as the pressure senders.  The AZ and Podi ones range from $60USD to $100USD whereas DD's Odyssey Series 2 is at a whopping $209USD, with an additional cost of $100USD for 4x150 PSI pressure senders and 1x400 PSI pressure sender.  Prices sourced from Bagriders.

Other digital readouts
The only one I've found so far is Dakota Digital's Odyssey Series 1.  It's very similar (actually I think it's the same?) as their pressure displays on their digital management controllers.  They are mounted ideally on a flat surface of the dash.  They function identically to the Series 2 (same type of pressure sensors, same switchable display to a single tank pressure readout).
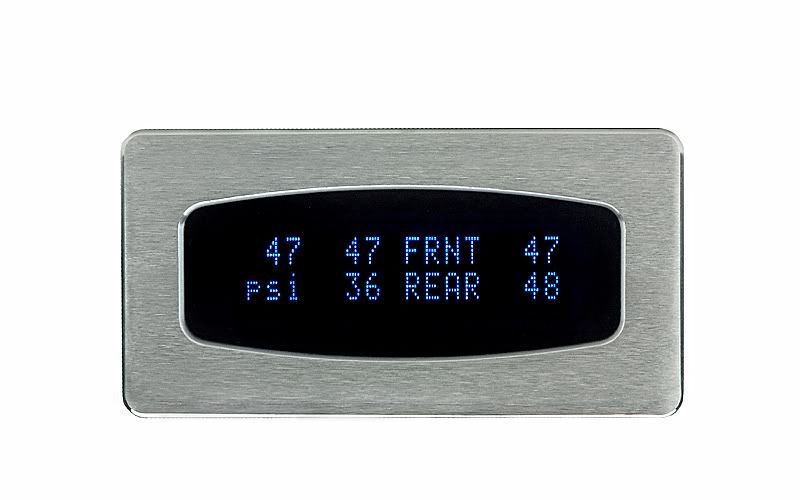

This is the same price as the Odyssey Series 2.

Check out some examples of mounted digital gauges over at airsociety.com.

So analog or digital?
There has been some debate as to whether or not digital readouts are accurate or not.  My opinion is, they're no more inaccurate than the conventional analog dial gauges.  If one was to use the EasyStreet gauge, you can only really read out the pressure to the nearest 10 PSI.  Sure, any monkey can look at a dial and have a guess as to what the exact pressure is, but while you're driving and looking at a gauge that's more than likely to be mounted on a slight angle compared to where you're sitting, you really only have a fraction of a second to glance over and read what the pressure in your rear left airbag is at.  And at that moment, I'm pretty sure you'll read it as 60 or 70.  A digital readout not only displays the reading brightly and much larger than the increments on a dial, but it'll attempt to read it to the nearest 1 PSI.  If you're a doubter and don't believe in the gauge to be 100%, then you can always add your own +/- factor to it.  +/- 1 PSI if you're fairly confident in it, or +/- 4 PSI if you're not; either way, you're still gonna be more accurate than reading off that analog dial gauge.

Because of the relatively slow nature of the movement of the needle reading a change in air pressure, a dial isn't really required.  It's different to monitoring boost where knowing where it peaks and finding any fall offs is important, but with air suspension, the only critical things to monitor for are leaks and over-compressing which, to be honest, occur at extremely slow rates (relative to a car revving from 2000 RPM to 7000 RPM anyway).  That all said, a digital gauge reading to every 1 PSI would be better for such a monitoring job.

In my opinion, going for an electrical reading is a less troublesome choice.  Having additional air lines for analog gauges introduces more air leak locations and complicates the installation process.  It's easy to say "oh, just be careful with your installation and just make sure to overtighten everything" but, especially for the home DIY-er, you shouldn't be so naive.  Not only that, it'll mess up a tidy boot install with a load of T fittings and air lines.

One benefit I can see in using analog gauges is to match the other gauges in the car.  A digital gauge or even a modern-looking analog gauge can look out of place in an old car.  In these instances, perhaps an appropriate analog dial gauge might be cool, but that decision is a form > function choice.

My choice had always been a digital gauge, and after writing this up, it's only cemented it further.  So much so that I made my first purchase to start off my airride build - a DD Odyssey Series 2 (along with dual 444C compressors).

:D

Links:
http://www.bagriders.com/

19 September, 2011

Airride - compressors

The air compressor/s in an air suspension system is what drives and pressurises the air in the air tank.  It is essentially a motor that pumps air into a reservoir.  Like almost all motors, they require lubrication and most air compressors run with oil in them.  However, this may not be the most ideal when it comes to installing one for a car, especially if it's mounted inside.  One can imagine how hard it'll be to not make a mess when changing the oil and, worse yet, if it was to leak or blow and spit oil all over the carpets.

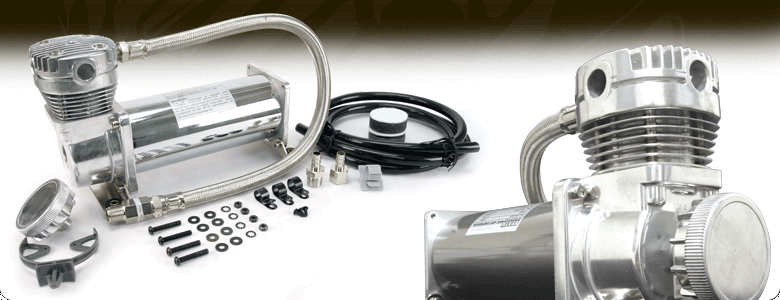
This is where VIAIR comes in with their completely sealed, oil-less C-class air compressors.  Being completely sealed means that they can be mounted anywhere, including outside of the car where it is subjected to dust and moisture; their oil-less construction means they can be mounted in any orientation (though VIAIR recommends they be mounted in its normal upright position - side-mounting may cause the piston seal to wear out faster as the weight of gravity may cause an issue; and mounting upside down may reduce the efficiency of heat dissipation as the heat will want to travel upwards into the motor housing as opposed to the cooling fins).  A few other things to note about the VIAIR compressors are:
  1. They do not require running in - just plug-in, check for leaks and away you go.
  2. They do not come with a pressure switch - one must install the compressor with a relay and pressure switch to ensure the compressor does not exceed its max working pressure (and if it does, compressor failure may occur).
  3. They are equipped with thermal overload protectors to prevent it from overheating and damaging any components.


VIAIR 480C

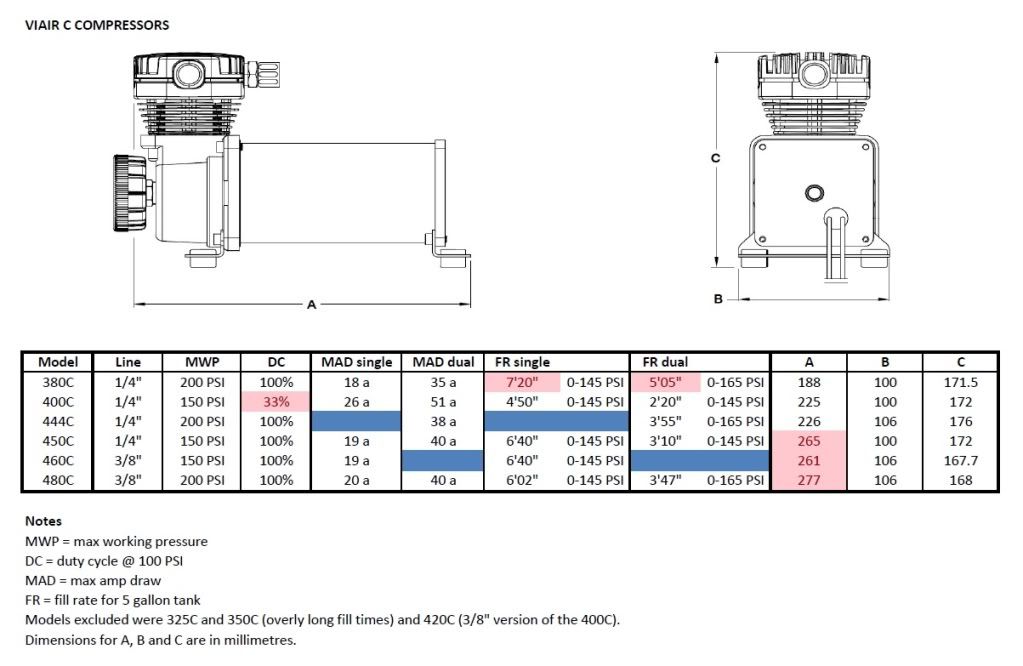
Now, before I go into comparing the different VIAIR compressors available, I'll explain over some important specs.  First of all, air compressors pump air into a tank through a leader line.  Common fittings are 1/4" and 3/8" NPT.  Obviously the larger leader line should be able to pump air in more efficiently, and the size of the line determines what water traps you can use.  Otherwise I don't think there's of any other significance.  Next, air compressors are made to be able to pump in a maximum working pressure (MWP).  This is a measure of how pressurised the air in the tank can reach before the compressor runs out of puff.  The higher the MWP, the stronger the compressor is (capable of having the tank store more pressurised air, thus more air in reserve).  The max pressure most airbags can contain I believe is up to 140 PSI (and they're rarely set that high up) so a compressor with an MWP of 140 PSI is sufficient for use in an air suspension system.  Scroll down towards the end of the article for a more in-depth view in this.  Next is the duty cycle (DC).  Expressed as a percentage of an hour, it explains how long the compressor can run at a specific pressure.  A duty cycle of 100% @ 100 PSI means that the compressor can run non-stop if the tank is constantly at 100 PSI (i.e. the air is continually being released out as the compressor pumps in the air).  Then we have the maximum amp draw (MAD).  This is the maximum electrical load that the compressor demands when it is running at its full capacity.  The higher the MAD, the harder the compressor is run.  This usually means a faster fill rate and hotter running temperatures.  Finally there's the fill rate (FR).  This is essentially the time it takes for the compressor to pump air into a certain tank up to a certain pressure, e.g. a 5 gallon tank up to 145 PSI. 

So keeping all that in mind, here is a fairly extensive comparison I did (over a day at work :D) between the 300 and 400 series C-class compressors (click for a readable size):


All the specs were taken from VIAIR's website.  The blank spaces are there as I couldn't find the specs for them, and I highlighted specs that I found undesirable in what I'm looking for in a compressor (or two).

I'll attempt to summarise my findings.  Based on those specs (and going off from user feedback I've found on various forums):
  •  Fastest compressor is the 400C, because it runs a more demanding motor (hence the high MAD and short DC).  It's also the loudest.
  • The smallest (and slowest) compressor is the 380C.
  • There's no huge difference between the 450C, 460C and 480C except the 480C has a 3/8" line and has a MWP of 200 PSI (I don't really have a preference for either - 200 PSI is nice but 150 PSI will still do fine IMO).
  • 444C seems to be the best of both worlds - small in size but "reliable".  200 PSI MWP is a bonus.
  • Cost goes up as you move up the model line (no major differences though)
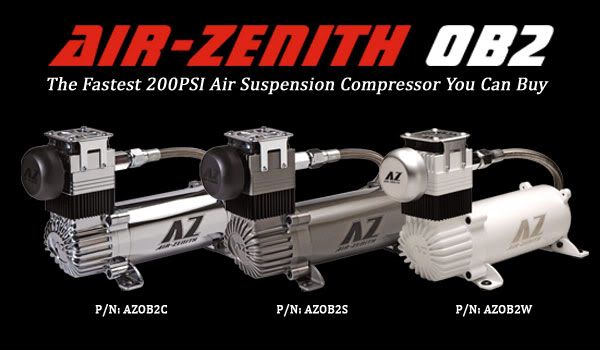
Since making that chart up, I've checked out Air Zenith's OB2 compressor.  Features are very similar to the VIAIRs, but it has a 2-year warranty over VIAIR's 1-year and also has a built-in cooling fan.  Here are its specs:

AZ OB2
Line: 1/2" NPT
MWP: 200 PSI
DC: 100% @ 200 PSI (not 100 PSI!)
MAD single: 35 a
MAD dual: 70 a
FR single:  3'31" (0-150 PSI)
FR dual: 2'05" (0-170 PSI)
Length: 320.5 mm
Width: 140 mm
Height: 206.1 mm


AZ OB2

It's simply a much larger unit capable of higher outputs.  Its fill rate with one compressor is comparable to that of a dual 480C setup, and as such, many retailers include a single OB2 or a dual 480C in their top-end kits.  There is a huge difference in pricing though - a single OB2 is comparable to that of a dual 480C kit.  All forum threads I've seen state that a single OB2 is more expensive than dual 480Cs, but trawling through eBay is showing up the opposite, with dual 480Cs being around $400USD before shipping, and an OB2 around $350USD before shipping.

Single vs Dual

Almost always, two units are better than one but I'll just go through it all briefly.  If comparing a single and dual setup comprising of the same compressors, then obviously having a dual setup reduces fill time as a consequence of more air being pumped into the tank.  As a result, the compressors run for a shorter period which in turn puts less load on them and the heat generation is reduced.  Also, if one was to fail, then you still have one more compressor to get you by until you can get it all sorted.  Ultimately a dual setup would provide for a very reliable system.  The only downside is the cost and having to sacrifice space.  I don't think it gets much noiser, but it runs for a shorter time so it doesn't drone for long.

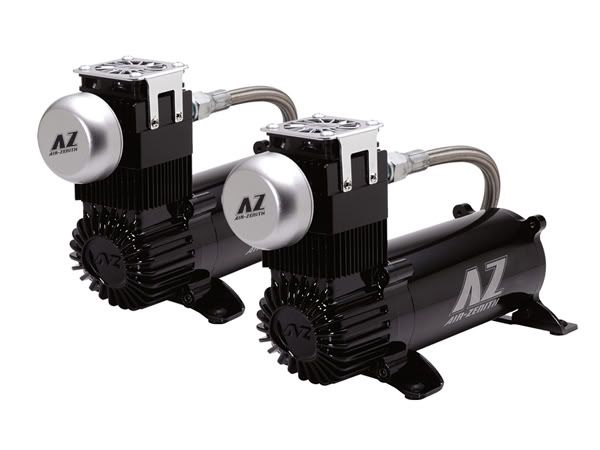
Since I introduced the AZ OB2, it would be interesting to compare using a single compressor versus a dual setup, especially since a single OB2 can pretty much go up against dual 480Cs.  Although there's only one OB2, it would still run as efficiently as dual 480Cs.  If anything, it'll be faster than the dual 480Cs (see specs above).  If I purchase from eBay, it'd be cheaper to get a single OB2 as shipping would be cheaper.  The OB2 is a much larger unit, but it's still smaller than two compressors.  Only problem though is the reliability side of things - if the OB2 was to fail, then there is no back-up compressor.  But then again, if funds allow, a second OB2 could be invested and easily plumbed in to the existing setup provided the tank has provisions for a second 1/2" port (which most purpose-built tanks should have).  That'd be awesome...

Dual OB2

Amp draw
Running two OB2s that require a max of 70 amperes made me realise that I should cover this issue.  Driving a hatchback means almost everything related to it is small and that includes the alternator.  An A3/Mk4 running the engine, accessories, two OB2 compressors pumping air @ 100 PSI and blasting the stereo system would be a massive ask for the stock alternator.  If I wanted to run dual OB2s and decent ICE later on down the track, I think I will have to uprate the alternator to a heavy duty unit and use a more appropriate battery.  I've thought about running two batteries but that will be another blog article I'll cover later on.

I guess what I'm trying to say is that when choosing compressors, it's not just a simple matter of cost vs fill rate; you gotta think about reliability too and not just the compressors, but with the rest of the car too.

MWP and using pressure switches
Pressure switches are a necessity in any air compressor setup so as to not overwork the compressor to pump pressures over its MWP rating.  Doing so will reduce the life of the working components of the compressor as it forces it to pump in air at pressures it's not meant to do.  So essentially, the pressure switches are put in place to kill the compressor once the tank reaches the set pressure.  These pressure switches also tell the compressor to turn back on once the tank reaches a certain lower pressure.  For example, 200 PSI pressure switches may have a cut-off (or should that be a cut-on?) at 165 PSI.  This means that at 200 PSI, the compressor will turn off and once the tank reaches below 165 PSI, it'll turn it back on again.

Sound deadening
For me, I don't want to sacrifice comfort when installing and using air suspension.  After all, I'm flicking switches so I can ride comfortable and without scraping everywhere, so sound deadening is an important topic to cover for me.

The best and easiest way to reduce the noise made by the compressors are to dampen the feet in which the compressor is mounted.  Mounting a compressor on rubber feet makes a huge difference if compared with hard-mounting a compressor on the chassis.  It's all to do with resonance - sound waves are dispersed through vibrating air molecules; a piece of metal resonating from a mounted, active compressor will make a fuckload of noise.

Sound deadener materials lined over the immediate area of where the compressor is mounted will work too.  Products like Dynamat, however, adds weight to the area.  This reduces physical vibration, decreasing resonance.  It doesn't actually stop the sound waves though - a material that "combines a thick foam decoupler with a polymer barrier" is what you want to use.  An example is Vcomp.  Combining Vcomp with something like Dynamat would produce the best results (I would assume you lay the Dynamat first, then the Vcomp, since Dynamat is supposed to affect the material it's attaching to and the Vcomp acts on the sound waves).

Any barrier in between the compressor and the cabin of the car will also reduce the noise.  Mounting a compressor under a false floor will definitely reduce noise, and sound deadening the false floor will further dampen the sound.  Some guys have even gone so far as to house individual compressors, and installing a computer fan for ventilation and cooling.  This, combined with pretty much all the above combos will dampen the sound so much that it's barely audible if music is on.

Wiring in dual compressors
Came across this link and thought it'll come in handy later ;) http://bagriders.com/modlab/tech/dualc_wd.pdf

I think that's all for now, I'll add a few more things to this (like pictures!) as I am informed!

12 August, 2011

HID kits

We all should know that HID (high-intensity discharge) kits should only be fitted on projector-style headlights and not reflector-style halogen headlights.  However there's a whole lot of debate about whether or not retrofitted HID kits are legal even on projector-style headlights.  Something about some projector systems not having auto-leveling, nor headlight washers.  AFAIK, the face-lifted 8L A3 has projector low-beam headlights but does not have HIDs fitted to begin with, nor does it have headlight washers.  I'm not sure about the auto-leveling feature though as the only wires I notice going in towards the low beam is just the positive and negative wire to power the bulb.  Obviously if it's auto-leveling it'd be controlled electronically by a sensor communicating with the ECU?

So I wanted to open this post with that to give a disclaimer that whatever you do on your car regarding HID kits is solely your decision.  I'm just providing as much background info as I can.  Daniel Stern wrote up an annoyingly long piece on the issue of fitting HID kits so that'd be a good read for someone interested in the topic.

If still looking for a HID kit, then here are some of the options you can choose/consider from.

Battery source
You'll find kits designed for 12V or 24V or both.  This is dependent on the battery you use - most passenger cars use 12V.

Power wattage
The most popular kits come in 35W or 55W, but there are some that come in 75W, 100W and even higher.  This is essentially the intensity of the light that the bulbs produce.  As a side effect of the increased brightness, the bulbs will run hotter and in certain headlights where it's been designed to withstand a certain bulb's intensity, increasing it will cause components to wear faster or even melt (I'm thinking some of the plastic components and the wire insulation).  35W is the "standard" and the 55W seems to be the safe upgrade for them (google 35W vs 55W and you'll find quite a few forum threads with positive feedback on the performance of 55W).  Any higher and problems may surface.

Mismatched bulb and ballast kits may lead to premature failure of either too.  There are some cheap eBay kits advertising 55W bulbs with 35W ballasts and vice versa.  Both ballasts and bulbs are not designed to take different power.

Bulbs
Each kit comes with HID bulbs.  You cannot use your regular bulbs as use a different plug-in connection.  The best way to know which bulb type you need is to pull out your old ones and read the label around the base.  I know that for a face-lift model 8L A3, the main/low beam (projector bulb) is H1 and the high beam is H7.  For this A3, you'd want a HID kit utilising an H1 bulb.  For other 8L models, check this site out.

Temperature rating (in Kelvins)
This is what most people are concerned with when purchasing HID kits.  The temperature rating in Kelvins directly correlates to the colour of the light - the hotter it is, the bluer the colour.


The yellow of the 3000k provides the best light-penetrating power, and is the best in terms of absolute brightness.  As the temperature rating goes up, the brightness intensity decreases, although your eyes might feel otherwise.  4300k seems to be optimum temperature rating based on general consensus between brightness and "clarity".

CANBUS vs relay
Some of the higher-end HID kits provide the option of a CANBUS-wiring kit or relay.  With some of the newer cars, the ECU might detect a blown bulb if a HID kit is fitted on, resulting in an annoying dash display or an error code when the car is scanned by a diagnostic tool.  CANBUS-wiring kits allow the HID kit to be fitted on and have the wiring bypass this warning feature, tricking the ECU into thinking it's still running on the factory setup.  Relay kits, also known as plug-n-play kits, are found in your typical aftermarket HID kits.

DIY
I was searching for a DIY when it came to installing HID kits on 8Ls - here's a decent one.  It's for a typical relay kit.  One thing I would do differently is to mount them in a different location, perhaps somewhere hidden on the chassis rails, on the side of the radiator support or within the raintray.  I don't know if the units are waterproof though, but since they're supposed to be mounted in the engine bay, I reckon they should be waterproof.