
Cost me $40+AUD which was fuckin' expensive for a mere grommet, but it looked good and was the most subtle wiper delete plug you can really find.
So I tackled this yesterday.
First, the tools/materials needed to do a rear wiper delete on an 8L A3 or Mk4 Golf/Bora (and pretty much most of the other VAG years and range) are:
- Socket set (10mm and 13mm)
- Phillips head screwdriver
- Trim removers (or a flat-head would do)
- Cleaning agent (I used isopropyl alcohol)
- Plug to seal up the water squirter (I improvised with Blu-Tac and tape)
- Cable tie
- Grommet (27mm)
- Beer
Throughout the process, be careful not to smash or scratch the glass! Cover the immediate glass area with masking tape and cover the glass with a piece of cardboard if you're not confident.
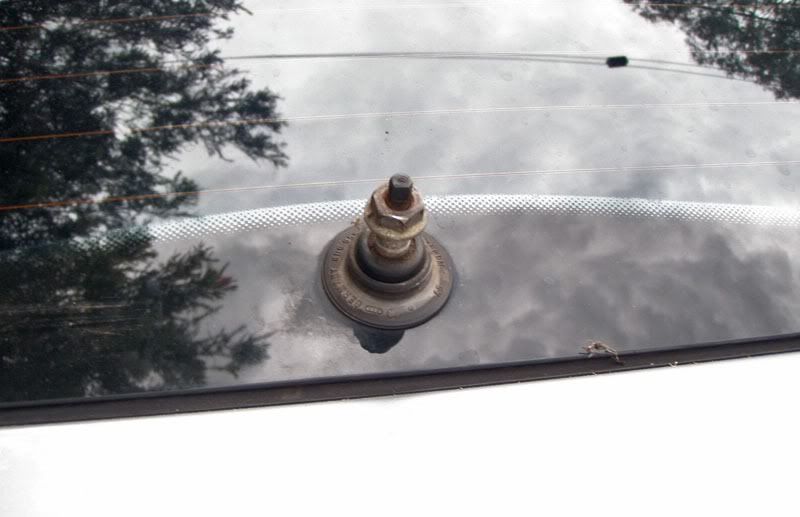
Using a flat head, pry the water squirter cover on the base of the wiper. It might help to wiggle the wiper arm a little as you try and pry the cap off (it'll still be attached to the arm, but it'll push back far enough for the next step).
Use a 13mm to undo the nut and once that's off, wiggle the arm back and forth to get it to dislodge off the stub. DON'T use a flat head to try and pry it out, you might smash your window!
Unfortunately I didn't take any pictures until now - here's the stub all on its own:
Now open the hatch and undo the two screws just inside the handle. I didn't take pics here but it's very easy.
Now the hard part, removing the trim panel. I found the best way to attack it is to try and pop the clips near the base of the windscreen first, then with the extra leverage you can work you're way down the hatch door. It takes a bit of force but don't worry, Audi made these trim plastics to be strong as fuck.
Next step is to remove the water line and wire connection plug (circled blue below). Then take your 10mm and undo the nuts holding the wiper motor (circled red). These nuts were strangely stuck on the rubber washers but a bit of prying with the flathead once they were off the thread got them off easy.
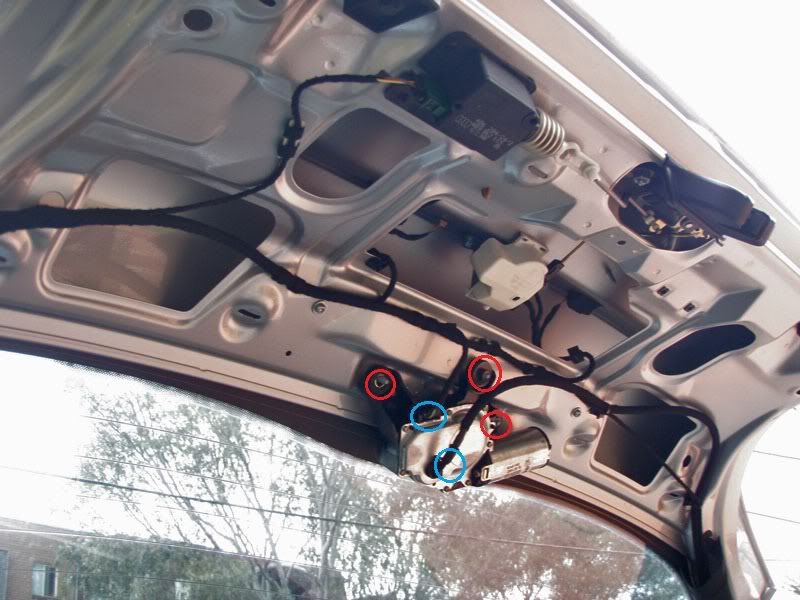
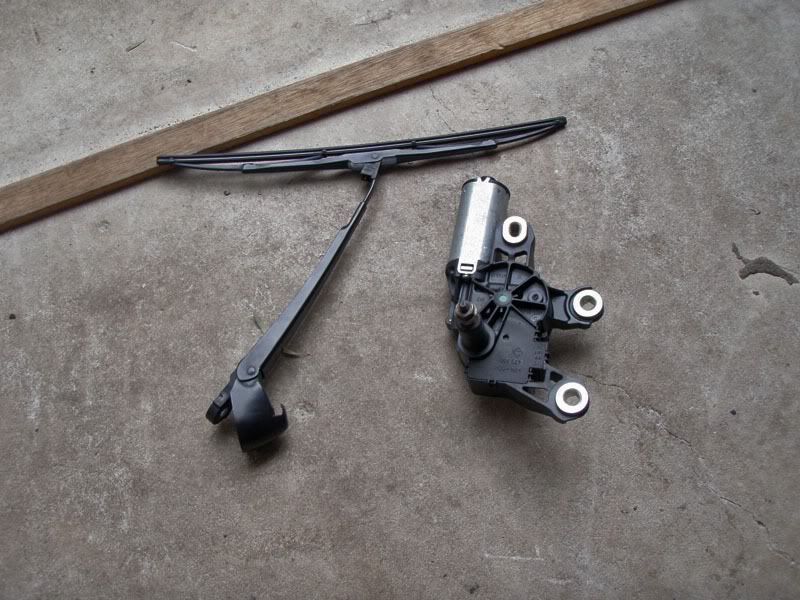
Wave goodbye (if you're keeping these, make sure the nuts screw back on their respective studs. It'll save you from having to hunt them down as it's virtually impossible to find them again after storage).
Next step is to plug the water line so if you accidently trigger the rear squirter, your hatch won't get all wet. Secure the loose electrical plug and water line to some of the existing wiring with a cable tie.

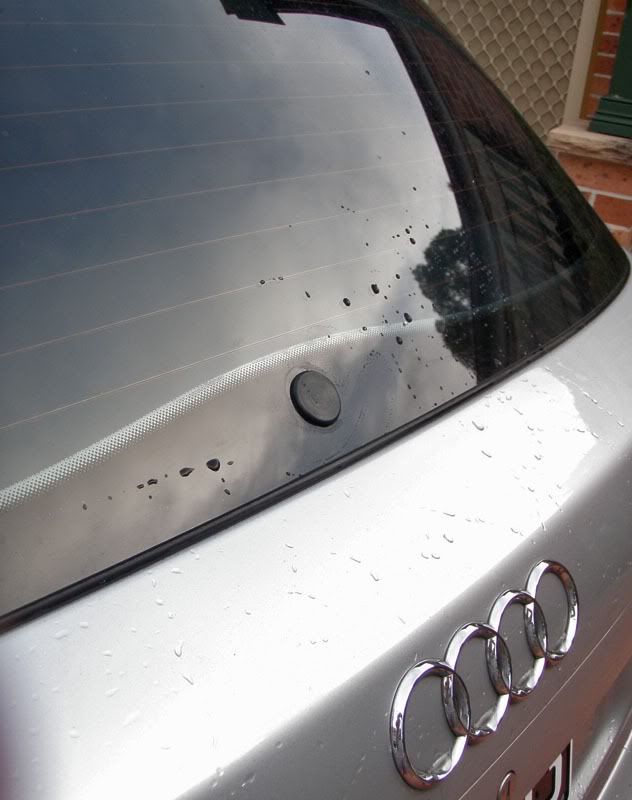
That's the hard part done. Now you can just remove the existing grommet, clean the area around the glass thoroughly and apply your grommet (along with any sealant if required).
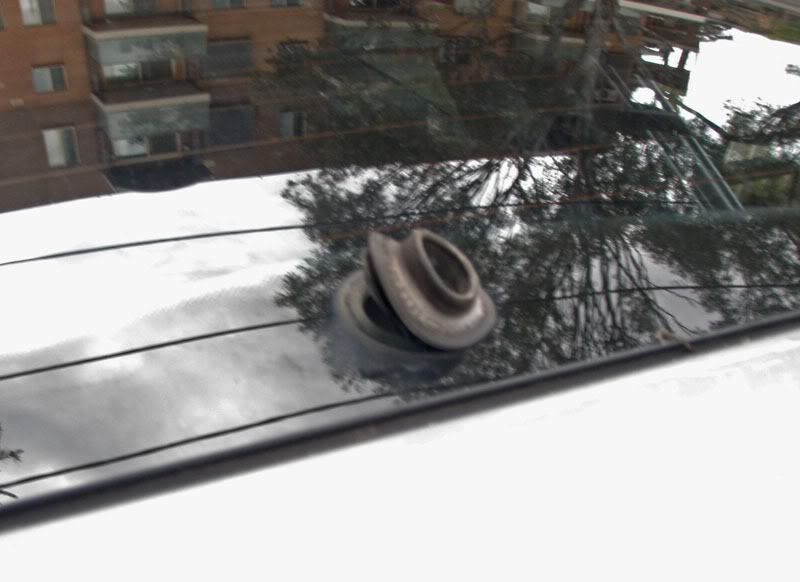
Weirdly, this step is where I got into trouble. The glass grommet I bought was unfortunately a fraction of a micrometre too big and, it being glass, there really was no leeway. I very slightly chipped a little bit of it, so I cleaned the hole around the glass again thinking there was some dirt that's causing the grommet to foul but nope, it was clean as. So I tried again on the glass grommet and I heard a crunch. I was dreading the worst and indeed, the glass grommet shattered and broke. $40 because I wanted to do something properly this time around compared to my Mk3 days, and how it backfired on me.
I ended up rushing to Clark Rubber and bought a rubber grommet to seal it up for now while I think of another neater solution. The 25mm grommet from Clark Rubber was actually a tight fit over the hole, but it worked fantastic and it doesn't leak at all. No need to apply messy silicon/glue either and it was 2 fuckin' 75. $2.75.
Never again will I buy from gecleant. I expected a nicely fitting grommet, or at least one that is slightly smaller in diameter which could be made up for by applying sealant. But oversized is a no-no, especially if the material is glass. If it was rubber or even plastic, it could have compressed a little to fit over...
Oh well, rant done, I'm over it. I'll stick to what I know best.
Here's Justin Fox's DIY over on VWGolf.net.au.
This comment has been removed by the author.
ReplyDeletehi there... we made alot progress in product quality after the last year... so there is no more "bad fitting" grommet out there... also we are able to deliver several sizes and special made glass plugs for vw/audi and many more in 0,05mm steps... so nobady needs to be afraid in getting a wrong size or something not fitting your car. so if you had tried to contact us and let us swap the wrong sized grommet we could have solved this. posting wrong informations like this above isn't realy fair in this case... regards from germany. gecleant.de http://www.gecleant.de/shop
ReplyDelete